So I just read this article about Mexican sandwiches, or tortas, in order to figure out what Vero had been calling this sandwich that we just made. It's a Pambazo. When I complained to a friend about not really liking much Mexican food, this is one of the things she suggested I try.
Yes, I haven't been enamored of Mexican food. It's hard to explain, exactly why, but maybe it has to do with the, in my opinion, unwarranted hyperbole surrounding the cuisine.. Everyone is like, Mexican Food Is The Best!, and I'm all, Okay, great! I can't wait!! And then I get here and all I find to eat for the first few weeks is basically a corn tortilla with some kind of meat (a little plain-flavored, if you ask me) and green salsa on it. Maybe a little crumbly cheese and a drizzle of cream. The cream ends up being my favorite part! Tacos, Chilaquiles, Flautas... they all taste the same, and it's not that great. Tacos al Pastor don't taste good either. What a weird flavor after thinking it was going to taste like kebab meat! And don't even get me started on the Huevos Rancheros. Who drowns a corn tortilla in tomato sauce until it falls apart and tastes like bits of cardboard floating in an overpowering tomato soup??
Anyway. One of the reasons I committed to taking cooking classes was to see what regular people eat at home. And to see if it was better than I was finding around. My conclusion thus far is that YES! The home cooked food is more interesting!
Also, my friend Joanne is coming to visit and she is going to help me find better food. I do not doubt that there is good food out there, but I am a little hampered by my first impressions, the fact that people say pregnant ladies shouldn't eat street food, and also the fact that the food already in my house (where I spend 90% of my time) is easier to get to. But she and I are going to take a food tour or two. And I will appreciate the food more!
Today Vero and I made Pambazos and they are *messy*, both to make and to eat. But they are quite yummy!
Ingredients:
chorizo sausage, cut out of it's skin
potatoes, cooked until soft, then peeled. (10 minutes on high pressure in my instant pot with enough water to cover works great)
rolls called pambazos, cut in half
chile guajillo (a dried chile that isn't very spicy. you need quite a few of them)
bit of onion
clove of garlic
and toppings! which are queso panela crumbled up, a drizzle of crema, guacamole, and finely shredded lettuce.
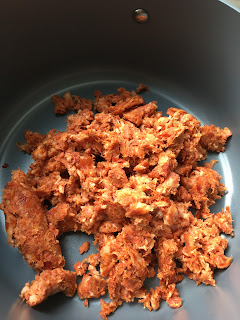
Cook the chorizo, breaking it up with wooden spoon, until it is in fine pieces and cooked through. The color doesn't change much, so I guess you have to go with the texture, mainly. The chorizo Vero brought did not render tons of oil, so that was good, but you may need to pour some off.
Chop your cooked and peeled potatoes roughly and start mashing them in to the chorizo, with the heat on low. It should form almost a dough. You don't want chunks of potato.


Now to make the chile sauce.
Slice open each chile guajillo and deseed it. These chiles need to be quickly fried in a bit of oil in order to soften and improve the flavor. You basically sizzle each chile in the oil for about three seconds on each side, just until it turns color. Apparently it is very easy to burn them. As you finish each one, deposit it in a small pot of boiling water. Boil them all together until... until they are done lol. I think it has to do with them being soft enough, and the water will be very red and oily looking.
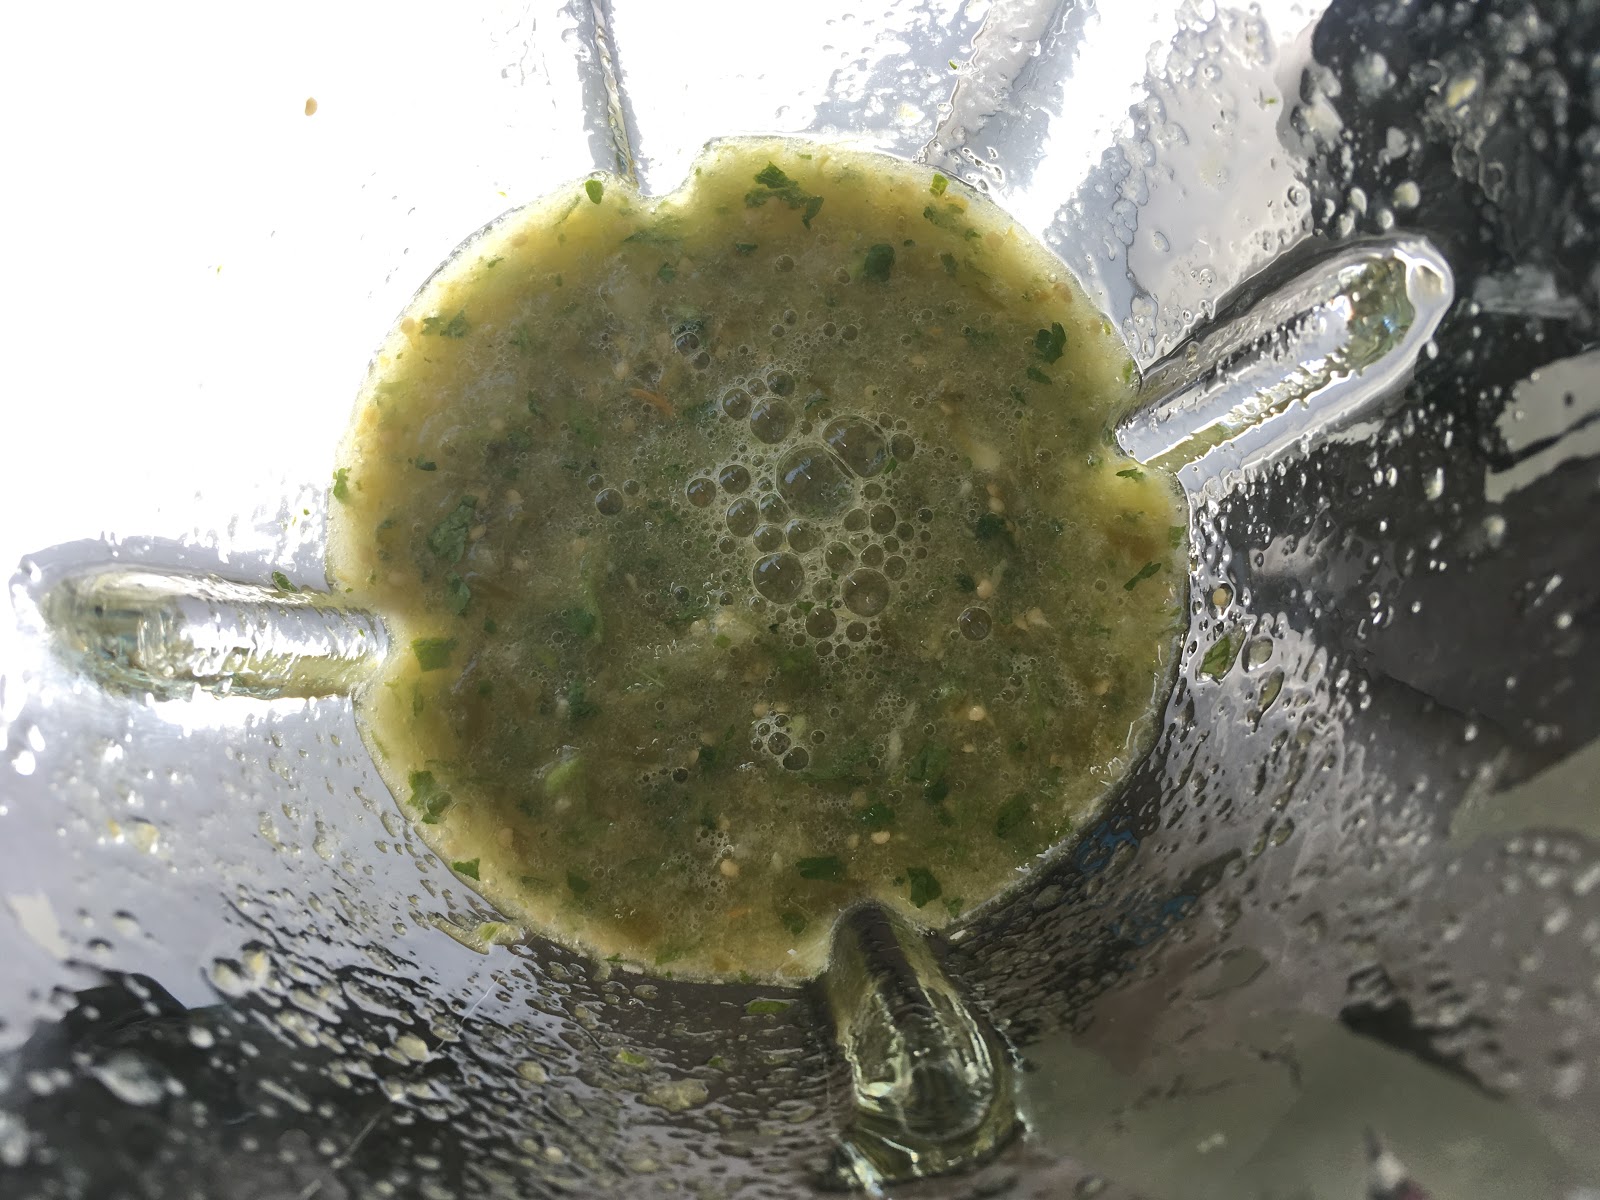
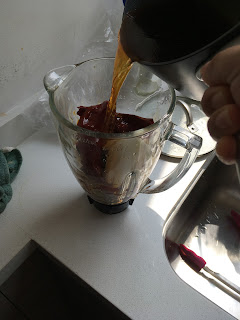
Blend the boiled chiles with a bit of onion and a clove of garlic and enough of the boiling liquid to make it the consistency of... something pretty liquidy.
Heat a bit of oil in a pan with high sides and then start straining the chile liquid through a strainer so that the tiny bits of skin do not end up in the pot. Apparently if you try to eat them, they will stick in your throat and make things quite uncomfortable for you. Heat the sauce through, adding chicken bullion to taste.


Now to assemble the sandwich!!
Get a frying pan with a teaspoon or so of oil medium hot.
Take the bottom half of the bun and smear the potato-chorizo mixture onto it. Drop the bottom half of the bun, bun side down, in the pan of sauce. Take it out of the sauce and drop it into the frying pan. Drop the top half of the bun, bun side down, in the pan of sauce also and then put it on the bottom half, sauce side up, of course.


Fry the sandwich on both sides until a bit of a toasted crust forms.
Remove the sandwich from the pan.
Open the sandwich and put the toppings inside! Close it back up and EAT!
Messy, but delicious!
Yes, I haven't been enamored of Mexican food. It's hard to explain, exactly why, but maybe it has to do with the, in my opinion, unwarranted hyperbole surrounding the cuisine.. Everyone is like, Mexican Food Is The Best!, and I'm all, Okay, great! I can't wait!! And then I get here and all I find to eat for the first few weeks is basically a corn tortilla with some kind of meat (a little plain-flavored, if you ask me) and green salsa on it. Maybe a little crumbly cheese and a drizzle of cream. The cream ends up being my favorite part! Tacos, Chilaquiles, Flautas... they all taste the same, and it's not that great. Tacos al Pastor don't taste good either. What a weird flavor after thinking it was going to taste like kebab meat! And don't even get me started on the Huevos Rancheros. Who drowns a corn tortilla in tomato sauce until it falls apart and tastes like bits of cardboard floating in an overpowering tomato soup??
Anyway. One of the reasons I committed to taking cooking classes was to see what regular people eat at home. And to see if it was better than I was finding around. My conclusion thus far is that YES! The home cooked food is more interesting!
Also, my friend Joanne is coming to visit and she is going to help me find better food. I do not doubt that there is good food out there, but I am a little hampered by my first impressions, the fact that people say pregnant ladies shouldn't eat street food, and also the fact that the food already in my house (where I spend 90% of my time) is easier to get to. But she and I are going to take a food tour or two. And I will appreciate the food more!
Today Vero and I made Pambazos and they are *messy*, both to make and to eat. But they are quite yummy!
Ingredients:
chorizo sausage, cut out of it's skin
potatoes, cooked until soft, then peeled. (10 minutes on high pressure in my instant pot with enough water to cover works great)
rolls called pambazos, cut in half
chile guajillo (a dried chile that isn't very spicy. you need quite a few of them)
bit of onion
clove of garlic
and toppings! which are queso panela crumbled up, a drizzle of crema, guacamole, and finely shredded lettuce.
Cook the chorizo, breaking it up with wooden spoon, until it is in fine pieces and cooked through. The color doesn't change much, so I guess you have to go with the texture, mainly. The chorizo Vero brought did not render tons of oil, so that was good, but you may need to pour some off.
Chop your cooked and peeled potatoes roughly and start mashing them in to the chorizo, with the heat on low. It should form almost a dough. You don't want chunks of potato.


Now to make the chile sauce.
Slice open each chile guajillo and deseed it. These chiles need to be quickly fried in a bit of oil in order to soften and improve the flavor. You basically sizzle each chile in the oil for about three seconds on each side, just until it turns color. Apparently it is very easy to burn them. As you finish each one, deposit it in a small pot of boiling water. Boil them all together until... until they are done lol. I think it has to do with them being soft enough, and the water will be very red and oily looking.
Blend the boiled chiles with a bit of onion and a clove of garlic and enough of the boiling liquid to make it the consistency of... something pretty liquidy.
Heat a bit of oil in a pan with high sides and then start straining the chile liquid through a strainer so that the tiny bits of skin do not end up in the pot. Apparently if you try to eat them, they will stick in your throat and make things quite uncomfortable for you. Heat the sauce through, adding chicken bullion to taste.


Now to assemble the sandwich!!
Get a frying pan with a teaspoon or so of oil medium hot.
Take the bottom half of the bun and smear the potato-chorizo mixture onto it. Drop the bottom half of the bun, bun side down, in the pan of sauce. Take it out of the sauce and drop it into the frying pan. Drop the top half of the bun, bun side down, in the pan of sauce also and then put it on the bottom half, sauce side up, of course.


Fry the sandwich on both sides until a bit of a toasted crust forms.
Remove the sandwich from the pan.
Open the sandwich and put the toppings inside! Close it back up and EAT!
 |
| Vero brought her kids this time! |